When Gif animated images first came in fashion, almost any website in the 90's were filled with those eye teasers. But Gifs have come a long way. Mostly limited to small dancing smilies in the old times, they are now catchy, colorful and real-life too.
A very common way to create a gifs is to convert a seemingly-repeating part of a movie or video into an animated Gif image. There are a few online solutions like gifninja.com which offer video to Gif conversion, but with a lot of limitations including quality.

So lets see how you can make good animated Gifs from a video yourself. The process involves two parts -
- Extract a sequence of image frames from the video.
- Assemble the images to show them in sequence with a custom delay as a Gif file.
Extracting image frames from video.
The best tool to extract images from a video is ffmpeg. You can download it from here. There are lots of builds of the tool in the link. Just download the static 32 or 64 bit latest version depending on your operating system. It comes as a zip from which you can extract ffmpeg.exe to say c:\ directory.
To extract frames from your video, run the tool using the following command replacing yourvideo.mpg with your video file.
c:\ffmpeg.exe -i yourvideo.mpg -r 10 img-%03d.png
This will extract frames with a delay of 10 milliseconds and their names will be like "img-001.png", "img-002.png" etc.
Creating animated gif from extracted images.
We will use the best, free and open source image editor called Gimp to create our Gif file. First download and install Gimp. Open it up and from the menu, select File->Open as layers and from the file dialog, select all the image frames we just extracted.
This will create a new image with a set of layers made of the image frames. Now select File->Export ("Save as" in Gimp versions till 2.8). In the file dialog that comes up, give a name for your image which should end with ".gif".
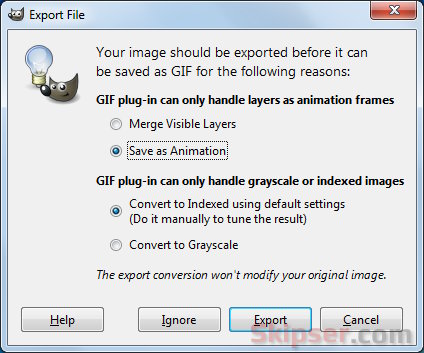
A new export window will open up where you have to make sure you have selected the "Save as animation" option and click the Export button.
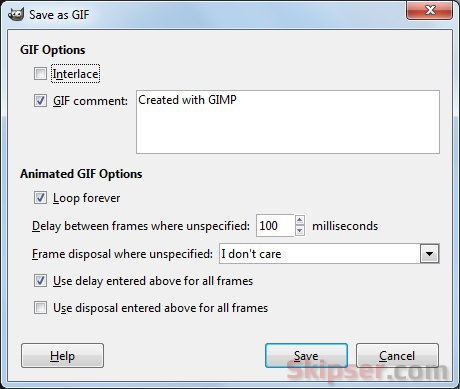
In the next window, enter the delay as 100, set the "Loop forever" and "Use the delay above for all frames" options and click save. That's it, your animated gif image is ready.
You can do a lot of magic with Gimp. One of the most useful thing you would need while converting a video to a Gif file is a size change. Most videos come in the standard sizes like 640x360, 1024x780 etc while the gif image you would want to create would be a different one. Resizing the image in Gimp is as simple as selecting Image->Scale Image and giving the width and height you want.
Unfortunately, you need two tools to do the job here - ffmpeg and Gimp. You can even convert video to image frames using Gimp itself with the Gimp Animation Package (GAP) plugin. But the process not that straight forward and there is little control over the frame intervals that makes the task a bit difficult. But if you are a Gimp enthusiast, it is definitely worth a try.